
No frother? No problem. A café-quality milk foam isn't locked behind a piece of equipment — it's a technique. People have been making frothed milk without dedicated tools for as long as espresso drinks have existed. You just need to know which method fits your setup and what to expect from each one.
These four methods all work. They differ in effort, foam quality, and what you need on hand. Here's an honest look at each one so you can pick the right approach for this morning — or any morning.
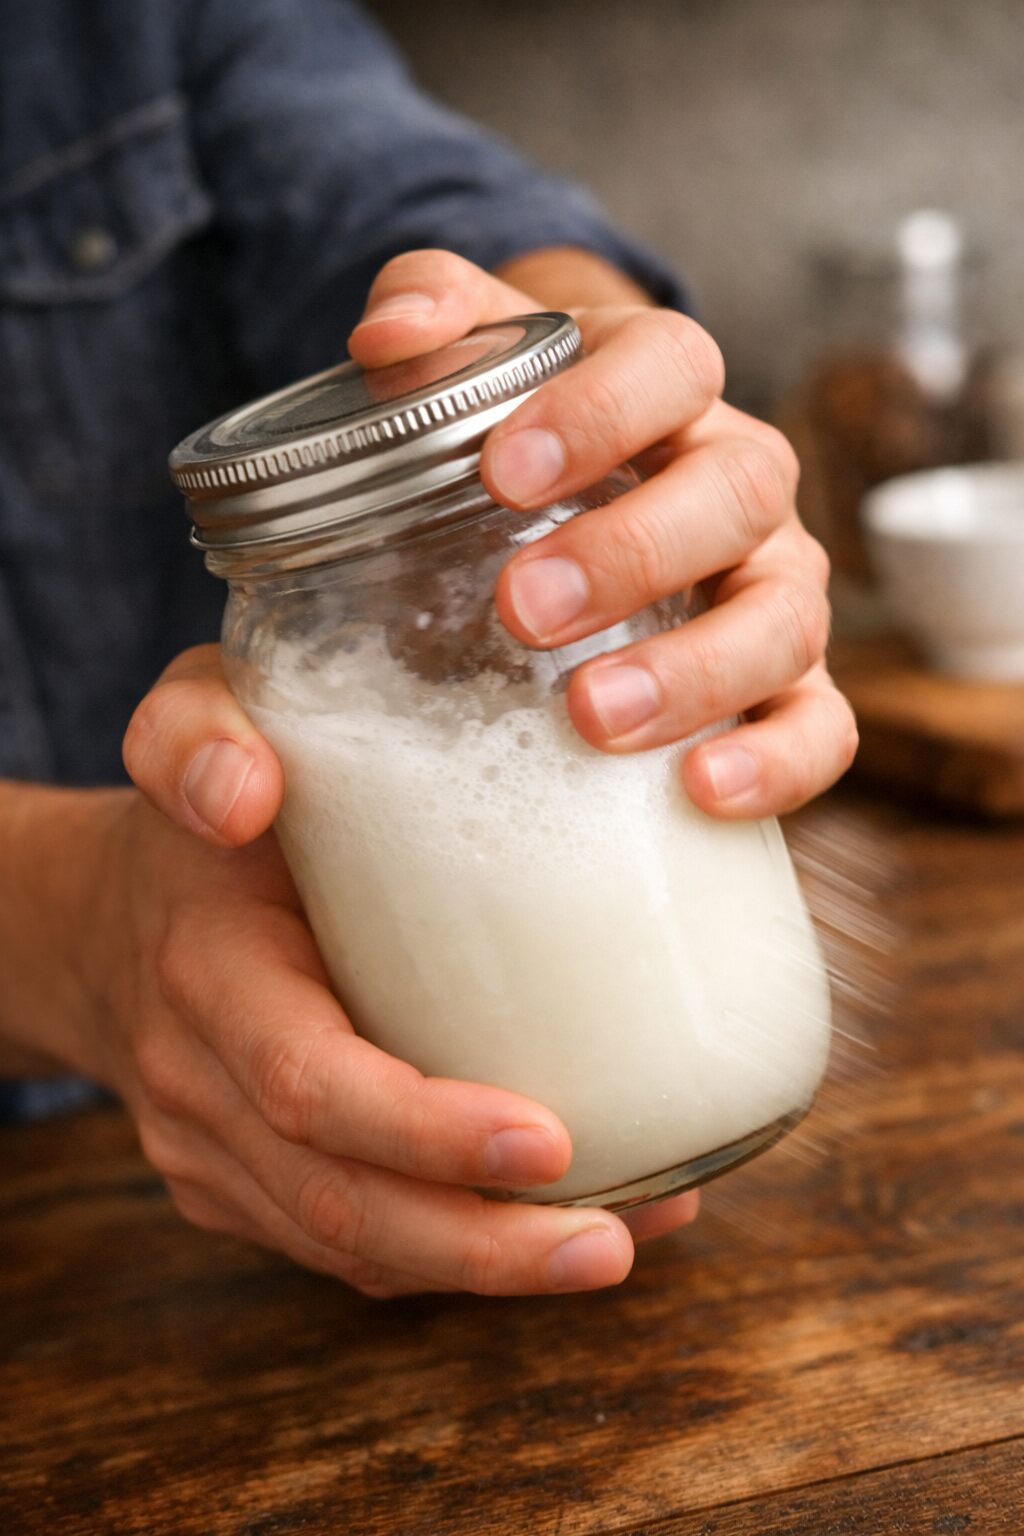
The simplest option on this list — no equipment beyond a jar with a lid. You shake cold milk into foam, then microwave it to set the bubbles. It sounds too simple to work, but the results are surprisingly decent for lattes and light milk drinks.
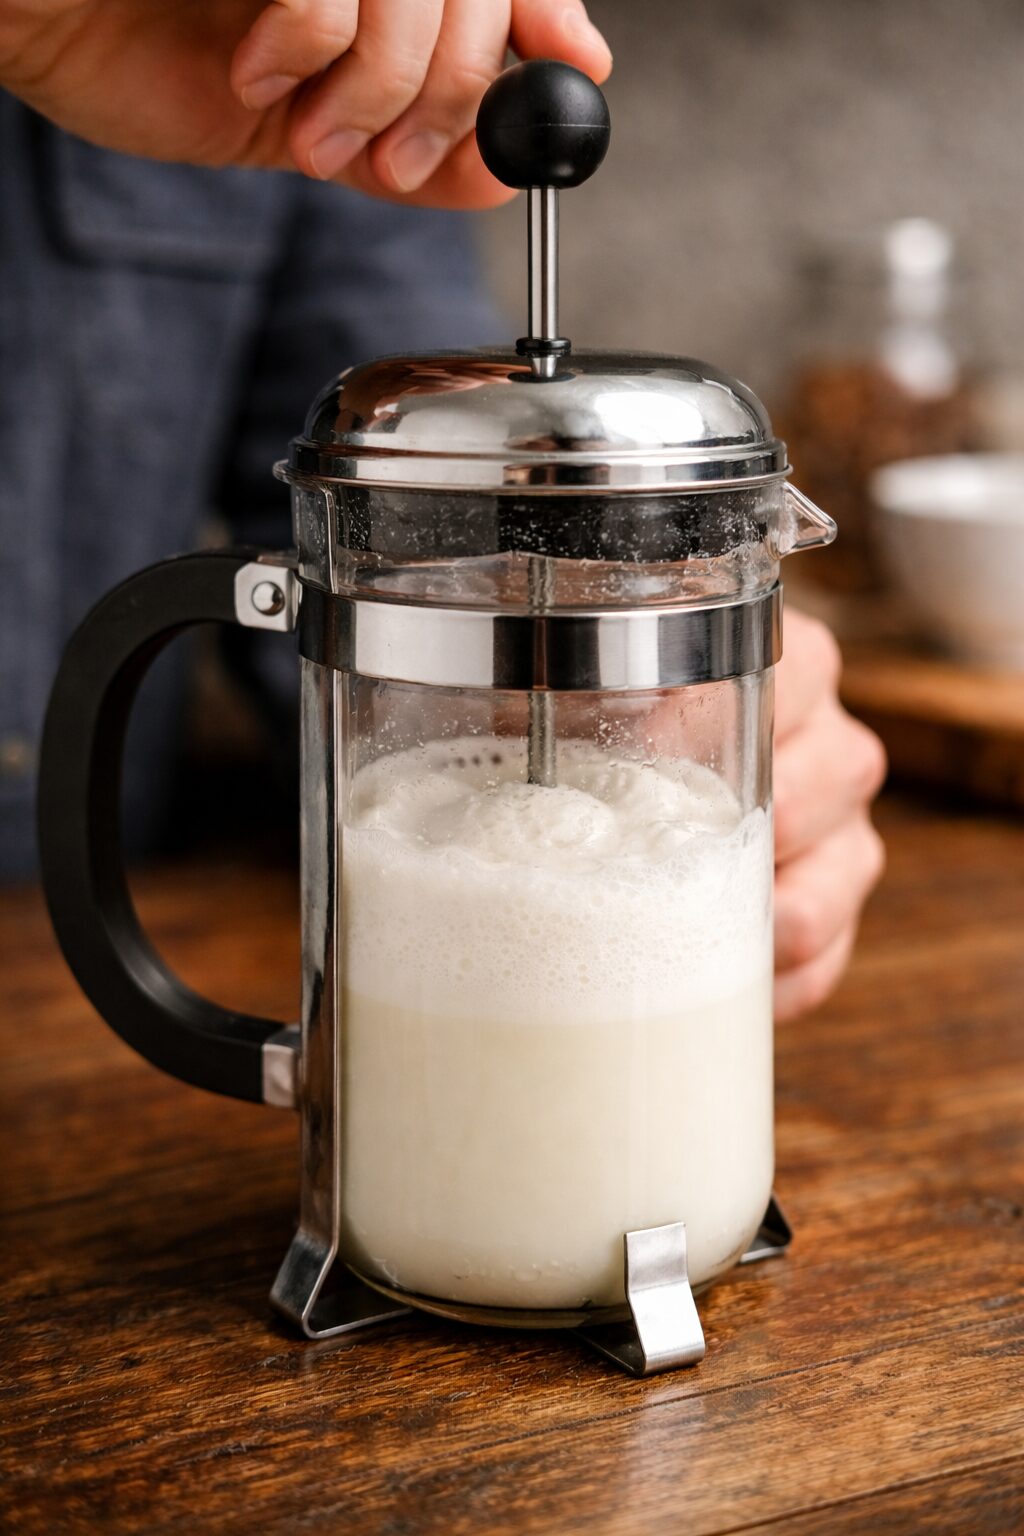
If you already have a French press, this is the best no-frother frothing method available. The mesh plunger does the same job as a frother coil — it forces air through the milk rapidly, creating genuinely good foam. The results are closer to what you'd get from a handheld electric frother than any other method on this list.
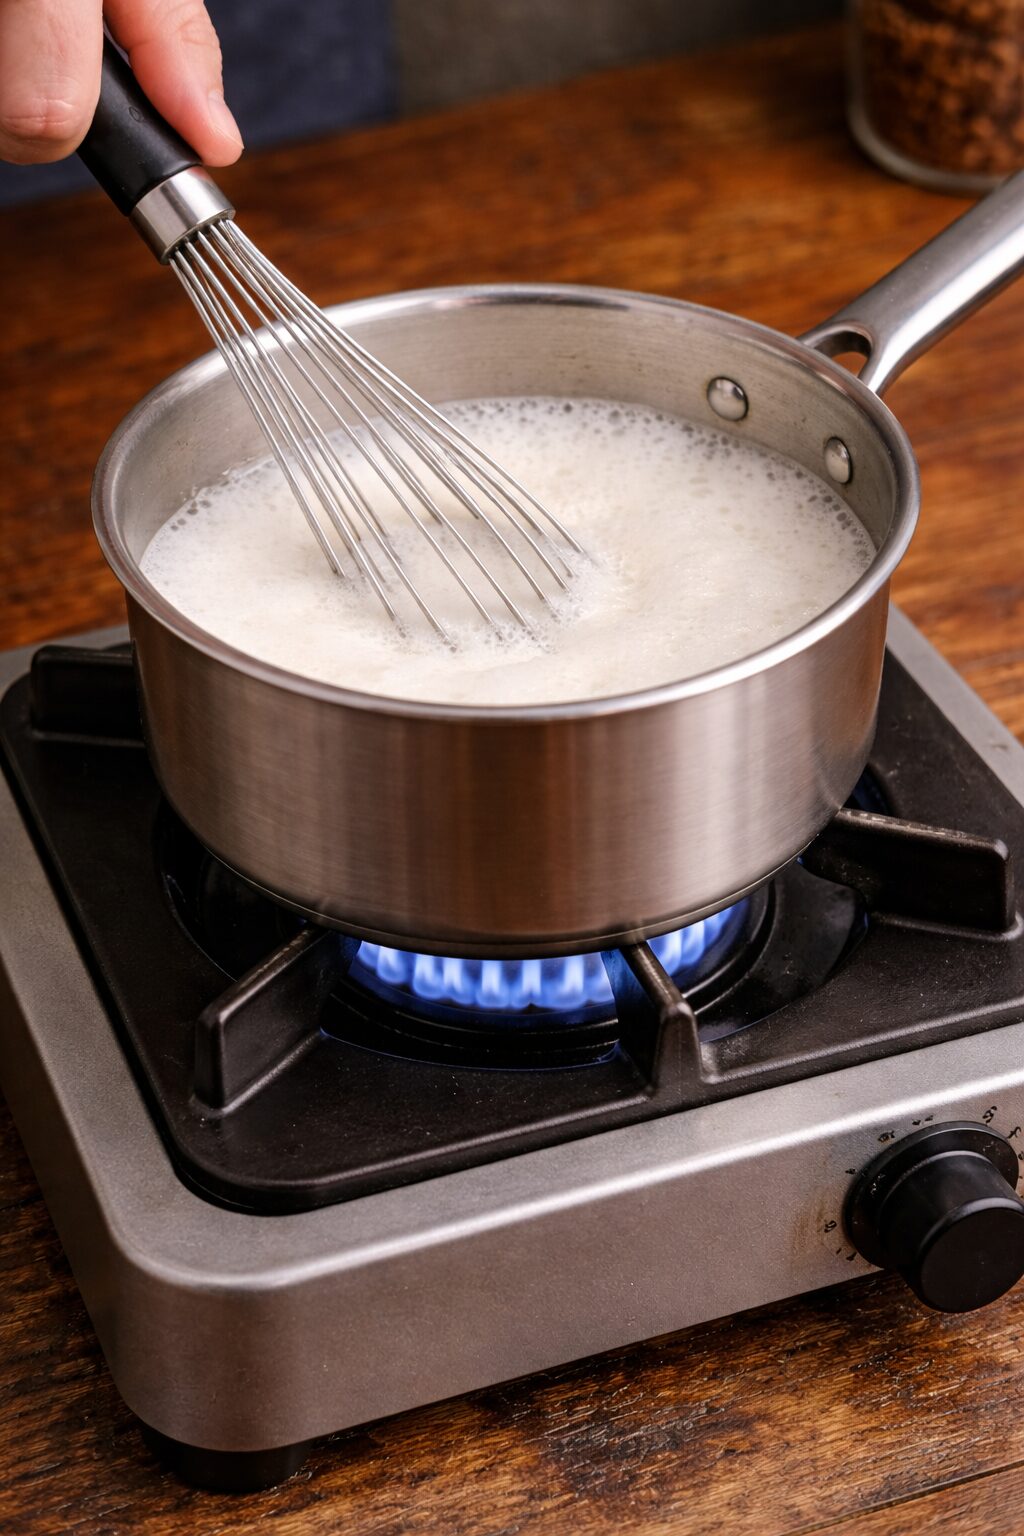
A standard kitchen whisk works — it just takes some elbow grease. This is the most manual option on the list, but it requires nothing beyond what almost every kitchen already has. An immersion blender (stick blender) is a faster variation of the same idea and produces better results with less effort.
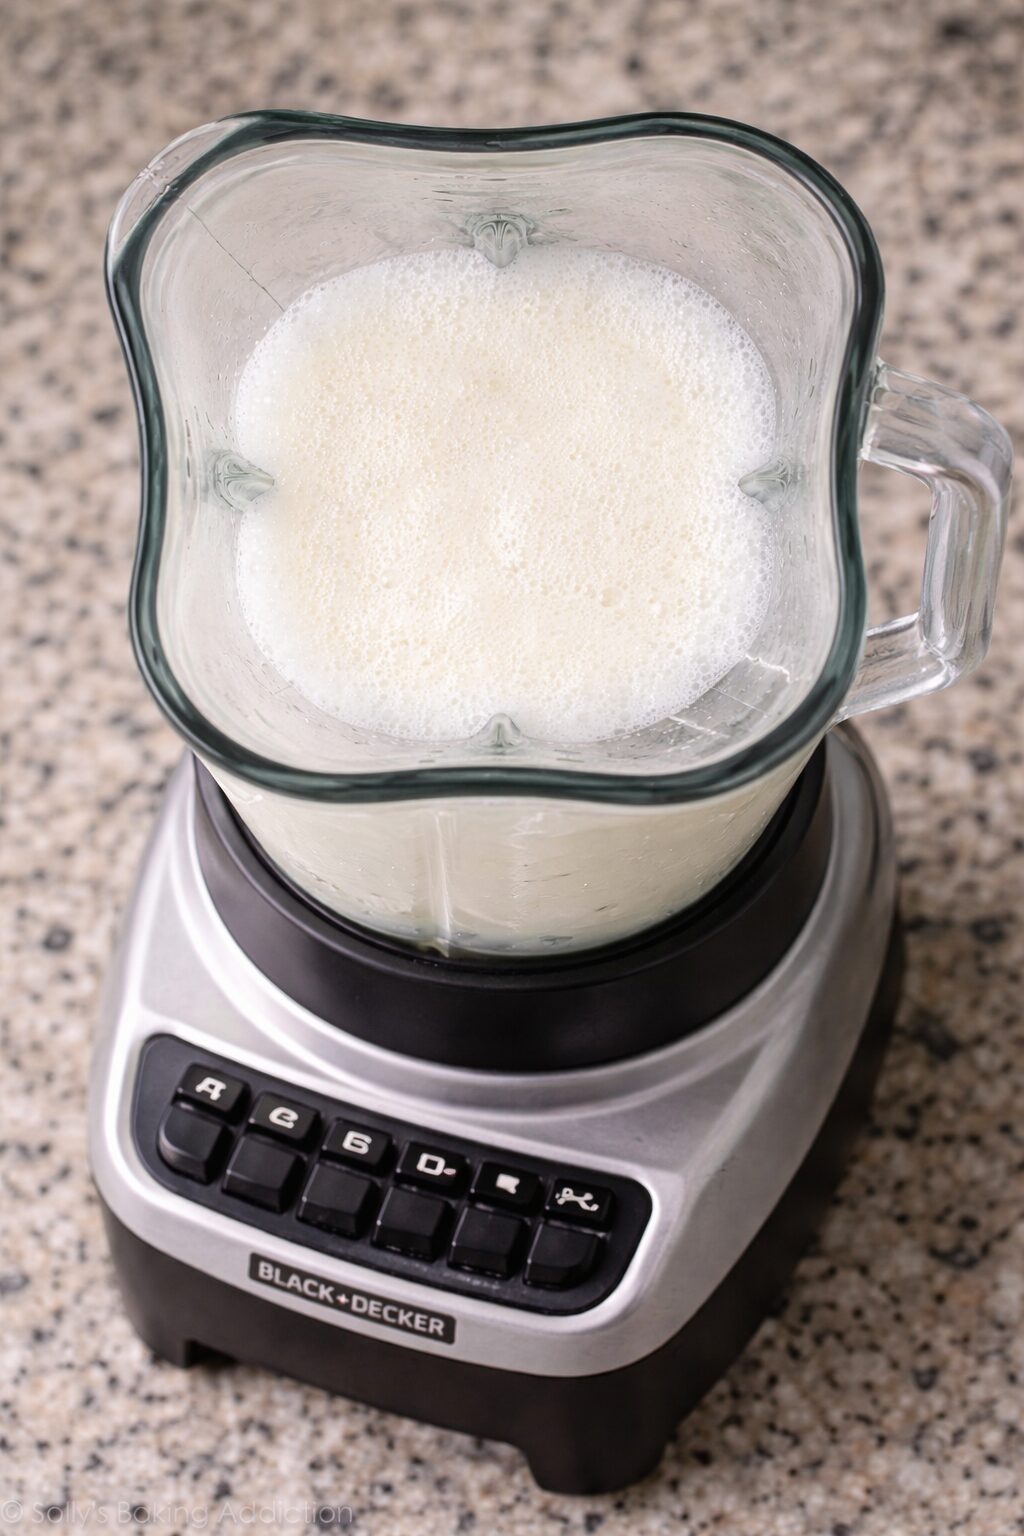
A countertop blender creates a lot of foam quickly — more volume than any other method here. The trade-off is that the bubbles are larger and coarser, which means the foam collapses faster and doesn't have the silky texture you want for a latte or cappuccino. It works best for drinks where volume matters more than texture — think frothy iced coffee or drinks with cold foam as a topping.
| Method | Equipment Needed | Effort | Foam Quality | Best For |
|---|---|---|---|---|
| Jar | Mason jar with lid | Low | Light, airy | Lattes, everyday drinks |
| French Press | French press | Medium | Best — dense, stable | Cappuccinos, flat whites |
| Whisk | Whisk or immersion blender | High / Medium | Medium | Lattes, basic drinks |
| Blender | Countertop blender | Low | High volume, coarser | Iced coffee, cold foam |
These methods all work, and for occasional lattes they're completely sufficient. But if you're making frothed milk drinks every day, the workarounds start to add up — extra steps, inconsistent results, and foam that doesn't hold as long as you'd like.
A dedicated frother — handheld or electric — solves all of that. A handheld frother runs under $15 and does the job faster than any method on this list. An electric frother heats and froths in one step with more consistent results. We broke down the differences in detail in our handheld vs electric milk frother guide, and if you want to see specific product recommendations across every price point, our full best milk frothers for home use guide covers everything from $8 wands to $200 automatic jugs.
The French press method produces the best foam of the four — denser, more stable bubbles that hold their structure for several minutes. If you have a French press, use it over any other method here. The jar method is the easiest if you don't have one.
Yes — all four methods work with oat milk. Barista-blend oat milk froths best because it contains added oils and stabilizers that help the foam hold. Regular oat milk is thinner and produces less stable foam. The French press method works especially well with oat milk. Keep the temperature below 150°F — oat milk scorches faster than dairy and loses its flavor above that point. See our oat milk latte recipe for more tips.
Three common reasons: the milk is too hot (above 160°F breaks down the proteins that create foam), the milk is too old (fresh milk froths better), or you're using ultra-low-fat milk (skim and fat-free milk produce larger, less stable bubbles). Whole milk froths most reliably. For plant-based milks, make sure you're using a barista-blend version rather than regular.
Yes — the jar method works well for cold foam. Fill a jar halfway with cold milk (don't heat it), shake for 45–60 seconds, and spoon the foam on top of your iced drink. The blender method also works for cold foam and produces more volume. Neither will give you the thick, stable cold foam you'd get from an electric frother, but both are decent for iced lattes and cold brew drinks.
For hot foam, aim for 150–160°F (65–70°C). This is warm enough to stabilize the foam but cool enough to preserve the milk's natural sweetness. Above 165°F the milk starts to scald, losing sweetness and producing flat, bubbly foam. For cold foam, start with milk straight from the fridge — the colder the better. See the complete guide to lattes for more on milk temperature and texture.

