☕ Quick Answer
Blooming coffee is a 30–45 second pre-brew step where you pour just enough hot water to wet the grounds, then wait. It lets trapped carbon dioxide escape from fresh coffee so the water that follows can actually extract flavor instead of fighting gas.
- What it is: A short pause at the start of a brew while CO₂ escapes the grounds.
- How long: 30–45 seconds (longer for very fresh beans, shorter for older ones).
- Water amount: Roughly 2× the weight of the coffee — e.g. 40 g water for 20 g coffee.
- Best for: Pour-over, drip, AeroPress, French press, Moka pot.
- Skip it? Only cold brew — cold water doesn't trigger the same CO₂ release.
- What it fixes: Flat, sour, or under-extracted cups from fresh coffee.
If you've ever poured water onto fresh coffee grounds and watched them puff up like a soufflé, you've already seen the bloom. It's the most overlooked 30 seconds in home brewing, and skipping it is the most common reason a fresh bag of beans tastes worse than it should.
This guide covers what blooming coffee actually means, what's happening chemically, why it changes the cup, and exactly how to do it across every brew method that benefits from it.
What Blooming Coffee Means
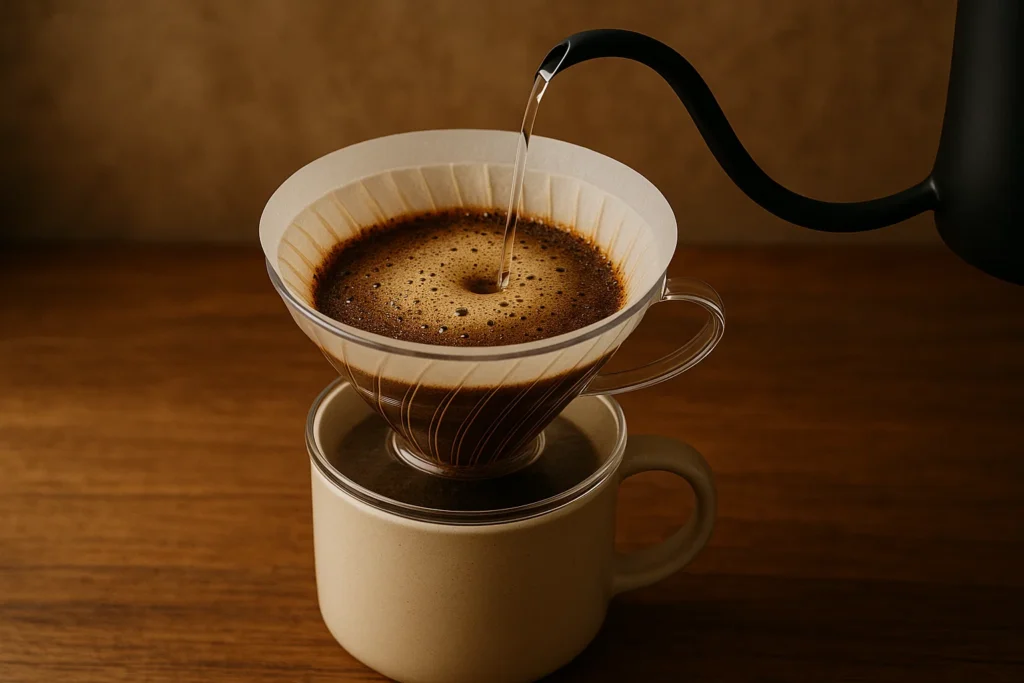
Blooming coffee means pouring a small amount of hot water onto fresh coffee grounds before the rest of the brew, then waiting 30–45 seconds before continuing. That pause lets carbon dioxide trapped inside the beans escape into the air, so the water you pour next can saturate the grounds evenly instead of getting pushed away by gas.
You'll know it's working because the grounds will visibly swell and bubble. Some people call this "the bloom" because the bed of coffee literally puffs up like a flower opening. Others call it pre-infusion, especially in espresso machines that build the bloom into the program automatically. Same thing, different name.
The technique is most associated with manual pour-over (think Hario V60 or Chemex), but every brew method that uses hot water and freshly roasted beans benefits from it. The only common exception is cold brew, which uses cold water and a very coarse grind — neither of which triggers a meaningful CO₂ release.
What's Happening Inside the Grounds
Roasting coffee creates carbon dioxide as a byproduct of the chemical reactions inside the bean. That CO₂ gets trapped in the bean's cellular structure and slowly leaks out over the weeks that follow roasting. Freshly roasted coffee — anything within about 14 days of roast, especially from a single-origin roaster — contains a lot of it. Older coffee, much less.
When hot water hits fresh grounds, the heat accelerates the gas release dramatically. CO₂ rushes out of the grounds and forms bubbles and foam on top of the coffee bed. Until that gas finishes escaping, the water can't get into the pores of the grounds where the actual flavor compounds live. The grounds are essentially holding their breath underwater.
The bloom step lets the gas escape first, on its own time, in a controlled 30–45 second window. Once the CO₂ has cleared, the rest of your pour can do its job: extract sugars, acids, and aromatics from the bean and end up in your cup instead of staying locked inside.
☕
Freshness checkThe size and vigor of the bloom is the simplest freshness test you have. A big, slow-collapsing dome means the beans are within a couple weeks of roast date. Almost no visible bloom means the bag is old — the coffee will still brew, but it won't taste like much.
Why Blooming Matters for Flavor
Skip the bloom and the trapped CO₂ does two things to your cup, both bad. First, it physically blocks water from contacting all the coffee evenly, so some grounds over-extract and others stay barely touched — that's under-extraction, and it tastes thin and sour. Second, CO₂ itself is slightly acidic when it dissolves in water, so a no-bloom cup picks up a sharp, vegetal acidity that the rest of the coffee's flavor can't balance out.
Cups brewed without a bloom consistently get described as flat, thin, or sour. The same beans, same grind, same dose, same water — just adding a 30-second bloom — usually come out rounder, sweeter, and noticeably more complex. It's the single highest-return technique change you can make to a manual brew, and it costs you 30 seconds and zero dollars.
James Hoffmann, former World Barista Champion, has tested this enough times to call it settled science even while he's running his own experiments on the edges of it. His standing advice: don't skip the bloom, but don't time it with a stopwatch either — watch the coffee bed and pour again once the foaming has slowed to a trickle.
Bloom by Brew Method
Blooming looks slightly different across brew methods, mostly because the gear changes how the water and grounds interact. Here's what the bloom should look like and how long to wait for each common method:
| Method |
Should you bloom? |
Bloom Water |
Wait Time |
| Pour-Over (V60, Chemex) |
Yes — essential |
2× coffee weight |
30–45 seconds |
| Drip Coffee Maker |
Yes, if the machine supports it |
~2× coffee weight |
30 seconds (some machines do this automatically) |
| French Press |
Yes |
2× coffee weight |
30–45 seconds, then add the rest |
| AeroPress |
Yes |
2× coffee weight |
30 seconds, then top up and plunge |
| Moka Pot |
Sort of — happens passively as water heats |
N/A |
N/A — no manual bloom step |
| Cold Brew |
No — cold water doesn't release CO₂ |
N/A |
N/A — skip it |
The pour-over numbers are the gold standard because pour-over is the method where the bloom is most visible and most impactful. If you're brewing with a manual pour-over setup, the bloom is non-negotiable. The other methods benefit too, just less dramatically.